NETWORKSTIP Networking CCNA,Centos,Ubuntu,Sql,

Made By Muhammad Nafees

Breaking

Showing posts with label windows Server2012. Show all posts

Saturday, 16 May 2020

May 16, 2020

Hide Files inside Image or PDF files


Hide Files inside Image or PDF files
  • Some times, we have to hide some files for particular reason like classified files and we do not want it be found by others.You just need :
  • Image File or PDF File
  • Files which are going to be hidden
  • Archiver Application (WinRar, 7Zip, etc.)
  • Command Prompt
  • Now just follow this steps :
  1. Compress your files and make them as archive file. In this example, I'm going to hide my test.rar file into my PDF (readme.pdf)
  2.  Open your Command Prompt and run it As Administrator, direct to your files location, then type this command exclude quote marks : "copy /b readme.pdf + test.rar redme.pdf". Please adjust readme.pdf with your own PDFfile, test.rar with your own compressed file, and redme.pdf with your own new PDF name and this is up to you to give the name. After that, click ENTER button.
  3.  If you did it right, you will get a New PDF files with bigger file size, because the binary codes between test.rar and readme.pdf are combined into one file is redme.pdf
  4. To open your hidden files, you just open your archiver application, in this example is WinRar. Go to your PDF files and extract it. You will get new folder named redme and you will find your test folder inside it.

Thursday, 19 March 2020

March 19, 2020

Block Copy Data From RDP Server 2012 & Server 2016

Clipboard Redirection Group Policy

Server 2016 

  • Type gpedit.msc inside the elevated command prompt.
  • Navigate to Computer Configuration -> Administrative Templates -> Windows Components -> Remote Desktop Services -> Remote Desktop Session Host. 
  •  Make sure the option Do not allow Clipboard redirection is Enabled.
  •  Make sure the option Do not allow Drive redirection is Enabled.
Note According to your Environment if you are using domain then apply policy according to your situation on Targeted OU or Site or Domain 


Server 2012

  • Navigate to Computer Configuration -> Administrative Templates -> Windows Components -> Remote Desktop Services -> Remote Desktop Session Host -> Device and Resource Redirection
  • Make sure the option Do not allow Clipboard redirection is Enabled.
  •  Make sure the option Do not allow Drive redirection is Enabled.
 2nd Methond for Server 2012
  • Win+R keys to open the Run dialog box
  • Type ServerManager -> press Enter.
  • Click on the Remote Desktop Services -> select Collections.
  • Select Tasks -> choose Edit Properties.
  • Under the Client Settings tab -> make sure Clipboard and Drive is disabled. 

Windows 10

  • Type gpedit.msc inside the elevated command prompt.

  • Navigate to Computer Configuration -> Administrative Templates -> Windows Components -> Remote Desktop Services -> Remote Desktop Session Host. 
  •  Make sure the option Do not allow Clipboard redirection is Enabled.
  •  Make sure the option Do not allow Drive redirection is Enabled.


Wednesday, 8 May 2019

May 08, 2019

How to Transfer roles from DC to ADC in windows server 2012

How to Transfer roles from DC to ADC in windows server 2012
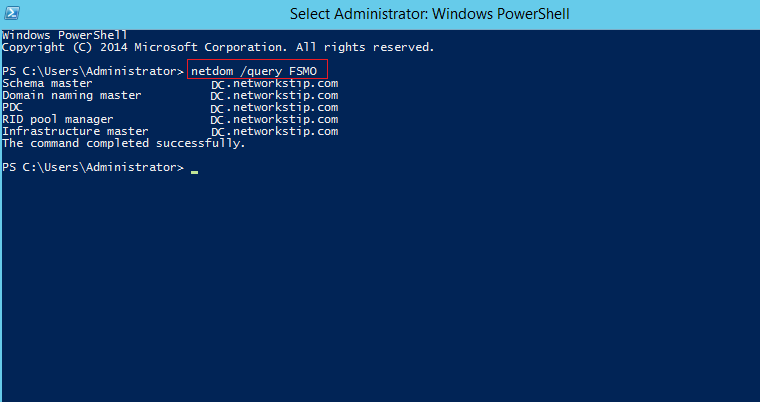
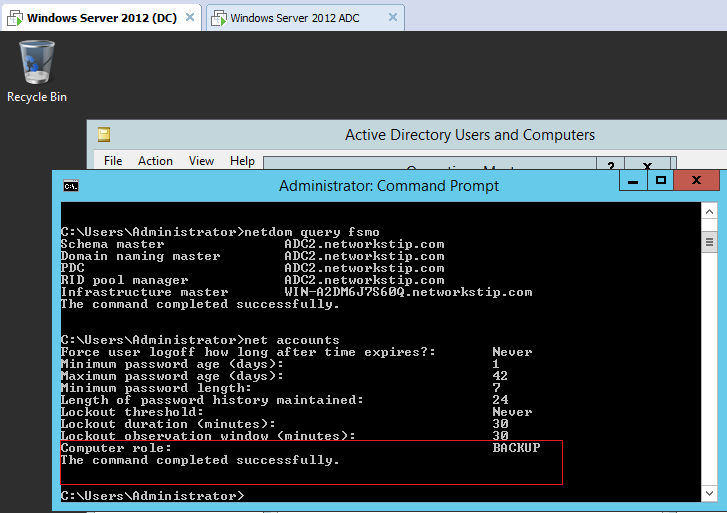
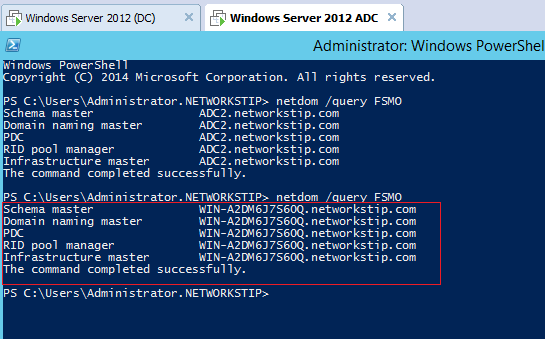
  •  open power shell type command netdom /query FSMO
  
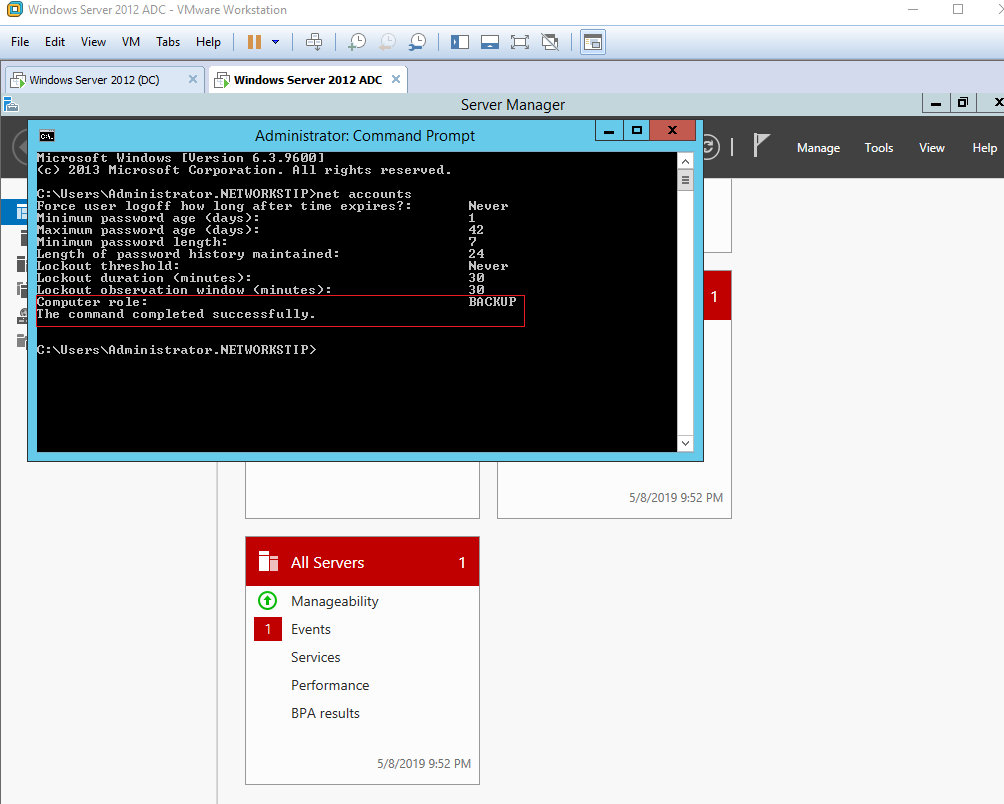
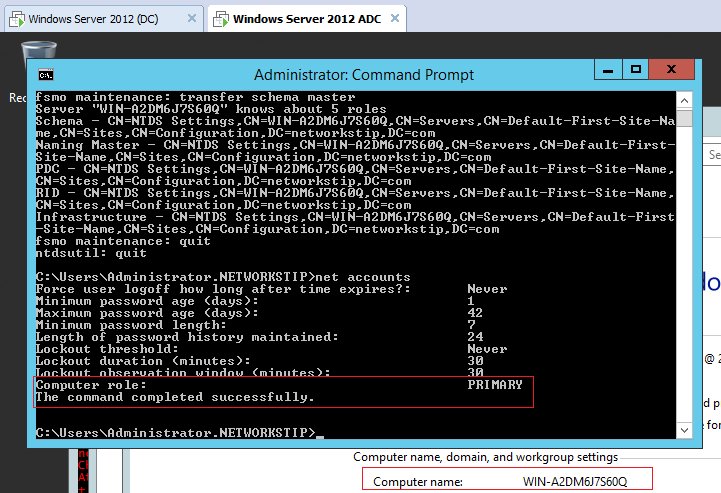
  • Open CMD type net accounts
  • Computer Role Primary  its shows this is DC


  • Now do the same on ADC
  • Computer Role Backup it shows this is ADC
  
  • Now Transfer DC FSMO Role to ADC
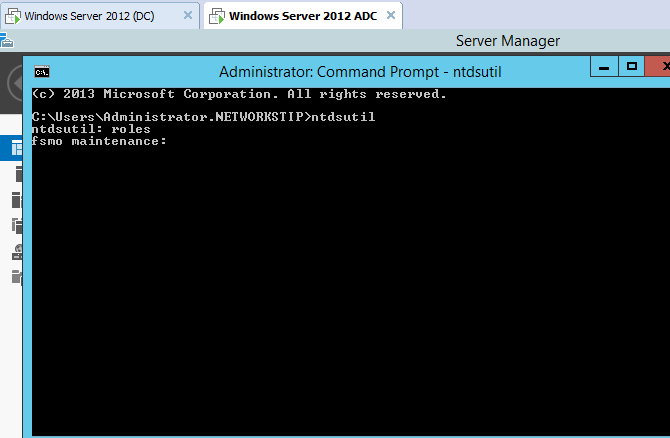
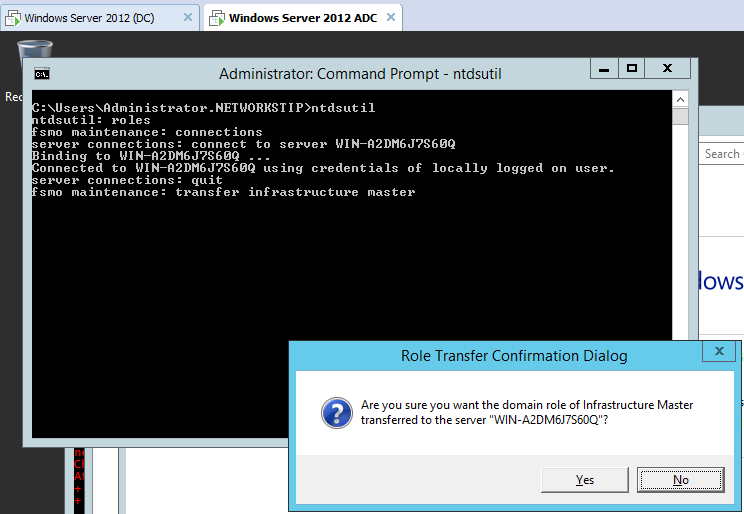
  • On ADC open cmd type ntdsutil 
  • then typ roles
  
  •  Then type connections
  • then type Connect to server server name  


  • Then type quit
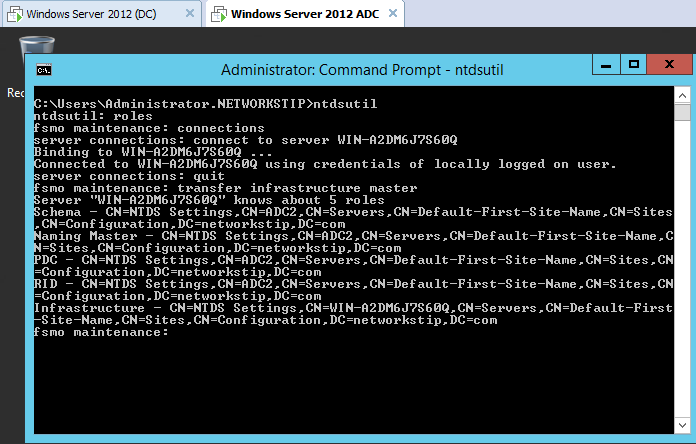
  • Now we are back to Fsmo Maintecance
  •  Then type transfer infrastructure master
  
  •  Press Yes
  
  • Then type transfer naming master

  •  Press yes
  • Then type transfer pdc 
  • Then do the same press yes
  •  Then type transfer rid master
  •  Then type transfer scheme master
  • Finally All roles transfer quit now and check status of DC and ADC 
  
  • ADC is now Primary now check the status of DC


  • open shell type netdom /query FSMO
 

Wednesday, 24 April 2019

April 24, 2019

Install software from domian on client PC via GPO

Install software on domian and client PC via GPO
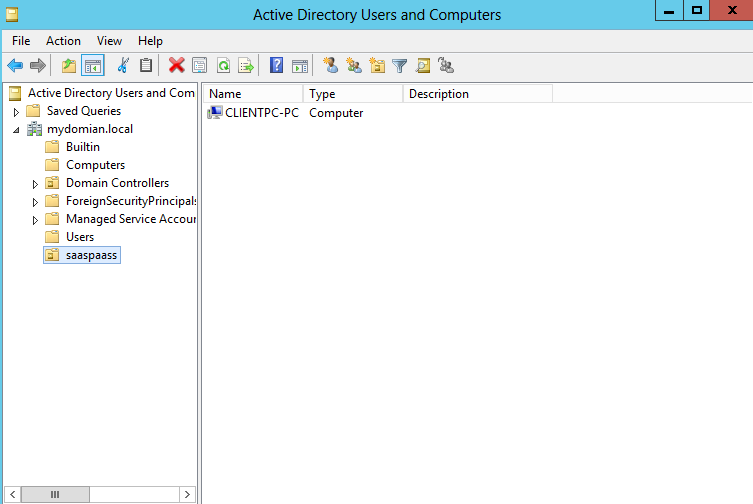
  • 1s Go To  Active directory users & Computer
  • Create New organization Group for computers which you want to install software
 

  • Now Move PC to this Unit
  • If you want to deploy  on users then create user and move user to this Unit
 
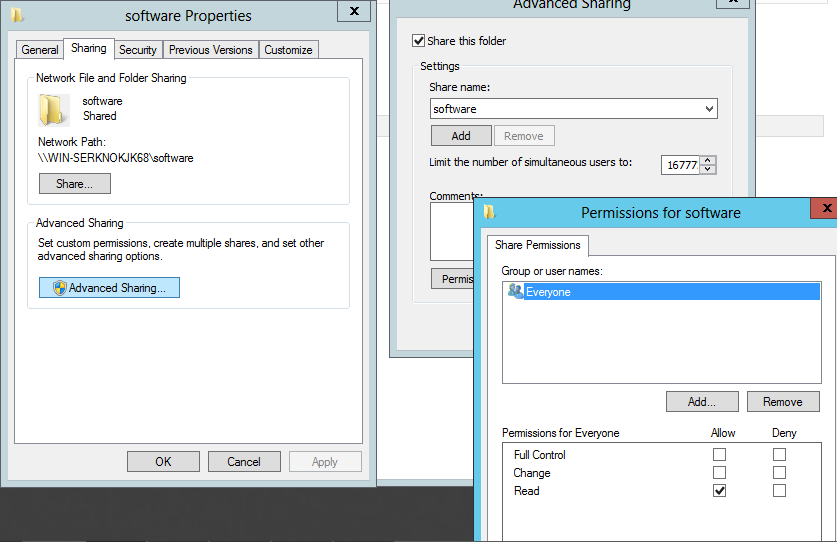
  • Now create a folder on server and share it to every one and make sure it is access able to every one
 
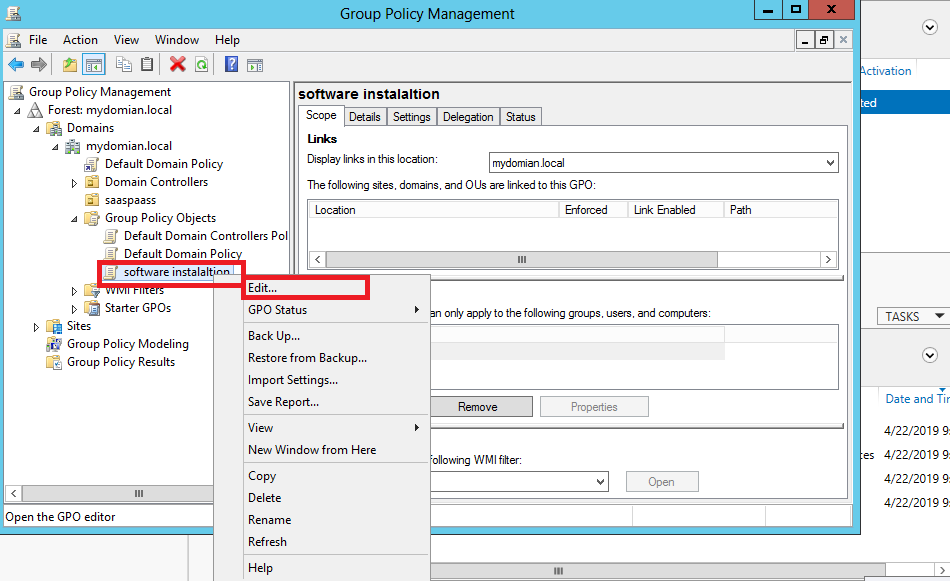
  • Now Go To Group Policy expend Domain click on Group Policy Object


  •  Create new Policy
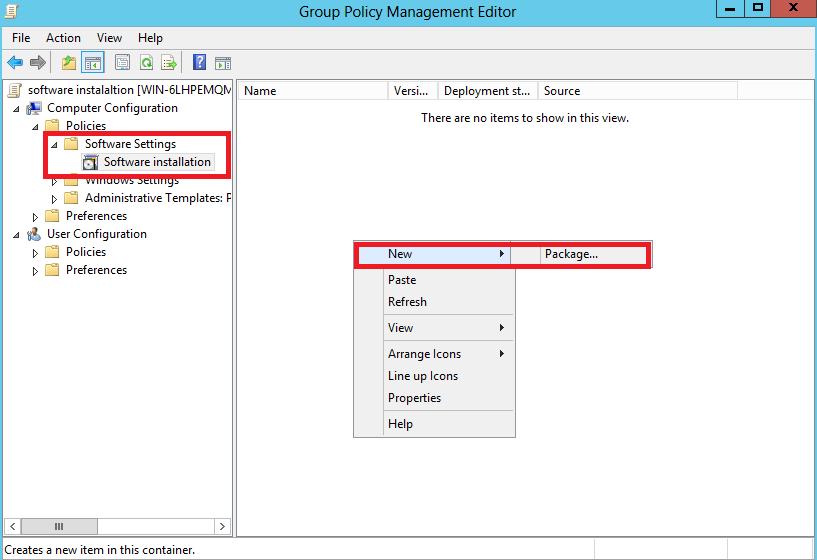
  • Then edit Policy 
 
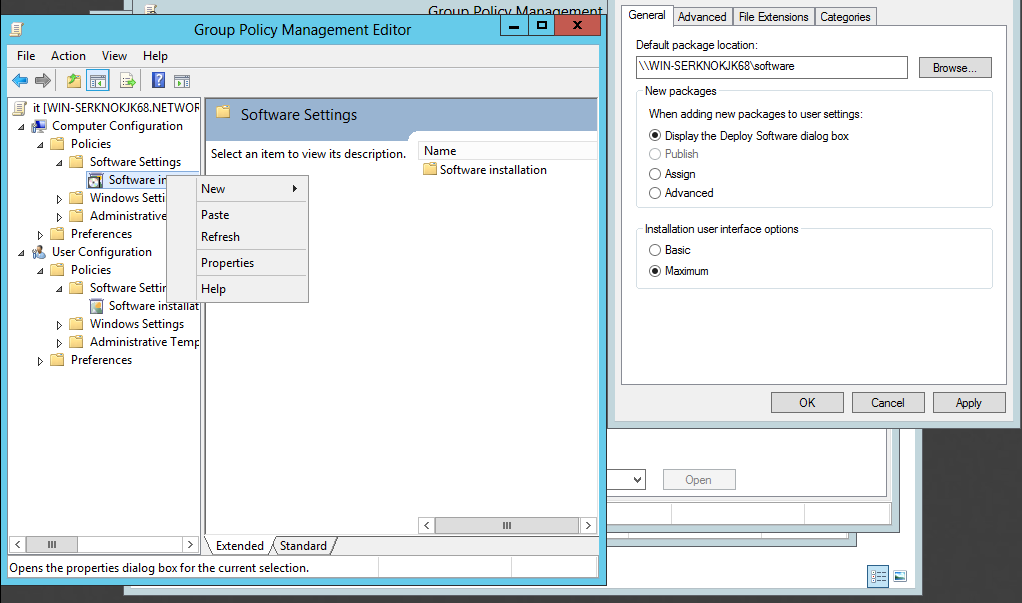
  • Now Right Click on Software Installation and Go To Properties
  • Now paste the share folder link in to the path and in package settings check Assign
 
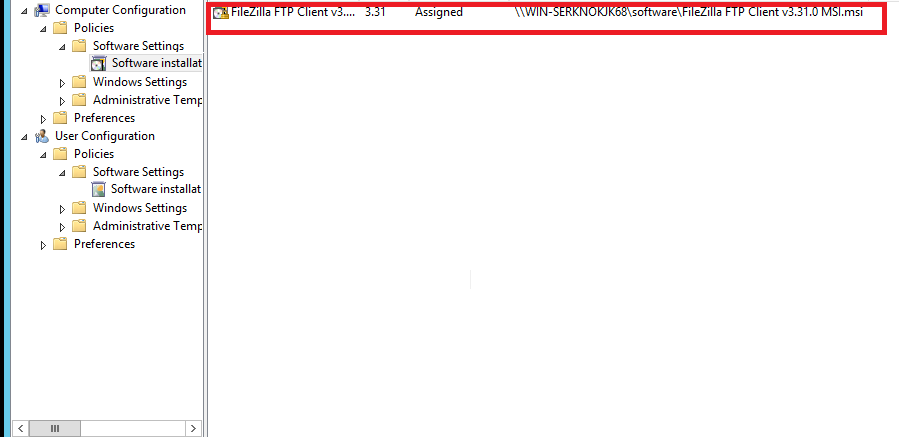
  • Now Go TO Computer Policy and select the software installation Packege


  • After selecting package popup message will appear click on assign 

  •  Back to Group Policy link OU to Group Policy in which you just add PC

  • Select the policy from list 
  • Open CMD on server type gpupdate /forece
  • Then Goto Client Machine
  • Open CMD type gpupdate /force

  • Press Y PC will Restart 
 
  • if application didnt install check firewall settings disable firewall and try again 

Monday, 22 April 2019

April 22, 2019

2 Fector Authentication For windows and Server Free saaspass

 2 Fector Authentication For windows and Server Free

  • 1st download Windows software from given link
  • https://saaspass.com/downloads/
  • install software in your server or windows 
  • open software will show screen like blew
  • Now download the android application on your mobile from play store
  • after Installation android app set 4 digit pin


  • Click Get Started
  • Then configure recover email and phone you will get email in to your inbox and a sms message on you phone No


  • Now Open SaasPass Software on your Desktop PC
  • Now Scan bar code from you saaspass app or just type Saasid in to desktop software then press push login you will get message in to mobile  Login click login

  • Type Pc password and activate and finish
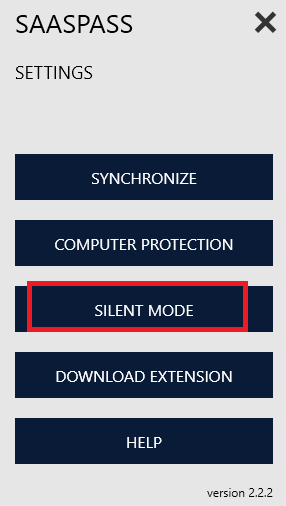
  • Run software as a silent mode
  • Click settings 

  • You can lock or unlock PC from andriod APP by click Remote lock and unlock

  • other way is just scan screen bar code form andriod app 
 

  • or just Click to push login you will receive message on mobile to unlock or type pc password & one time code from saaspass app

Saturday, 20 April 2019

April 20, 2019

Windows Server 2012 Remote Desktop Service RDWeb Remote App Publishing

Windows Server 2012 Remote Desktop Service RDWeb Remote App Publishing

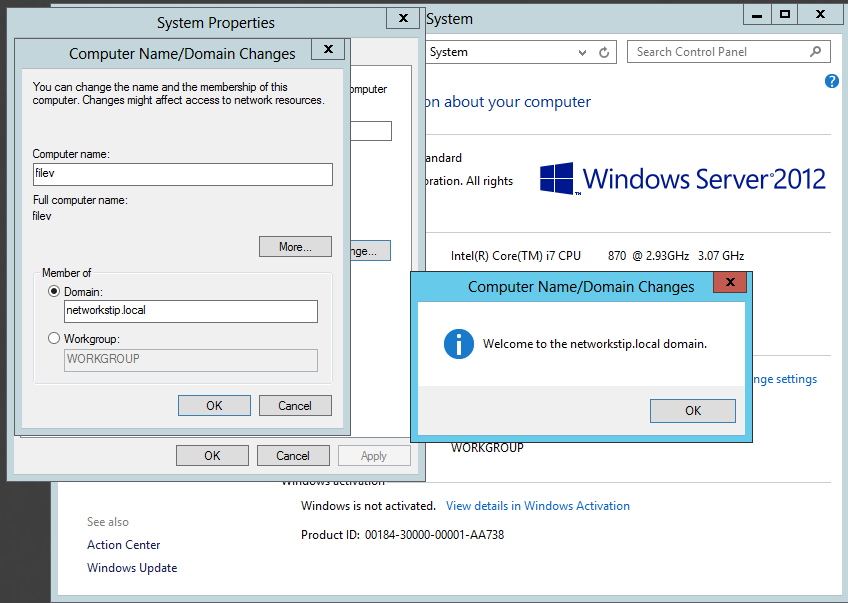
  • 1st Chnage the Server Name as you want 
  • This one is Remote app publishing server the server which you wana to make publishing server not DC 
  • Then change the DNS server as per your domain
  • Then joined the domain
 
  • Then login from domain admin account 
 
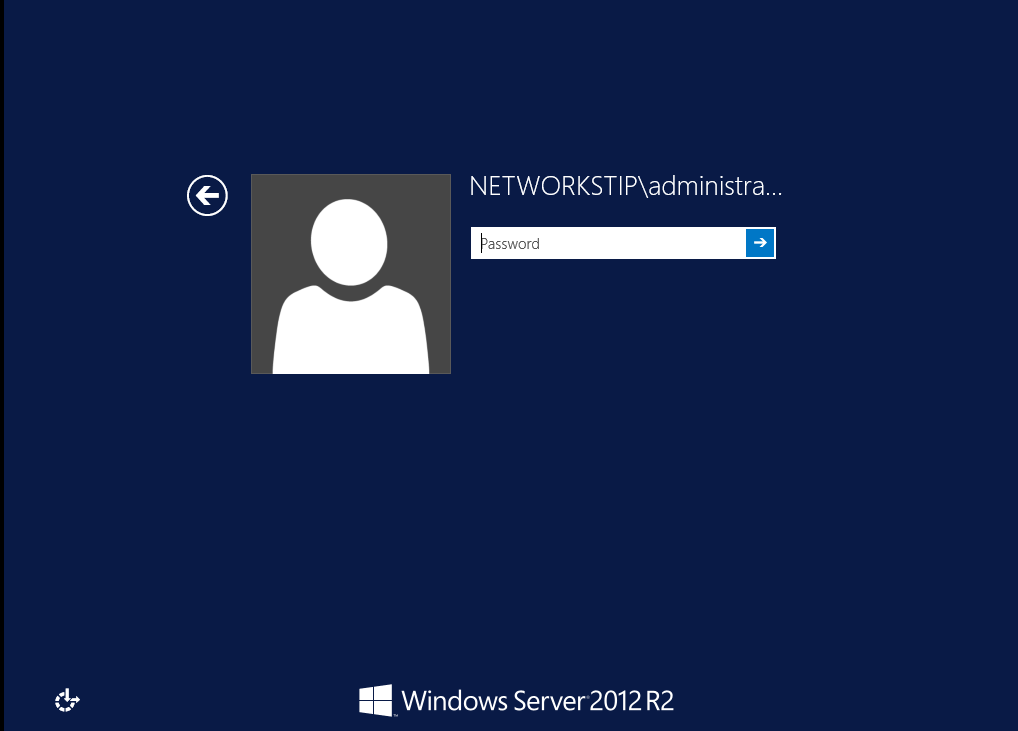
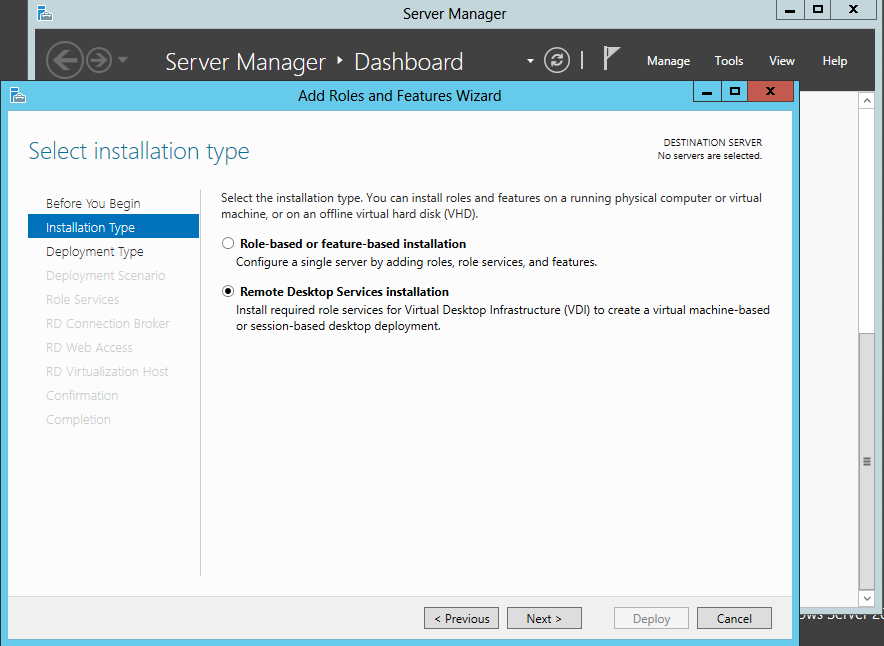
  • Then Installed The Role on Server Not on the DC the Remote App Publishing Server as in my case filev


  • It will restart once in installation & after restart it will completed installation 
  • After Completion of installation Remote Desktop Services feature will come in Server Manager
  •  Quick Session Collection These are 3 default application Published by Server

  • Publish Remote App click on publish remote app program
  • Click On add to Select Program Note Program must be installed on the Server
  • After Selecting Path of  Destination Program


  • finally Program is published now 

  • Now Create a User on DC in active Directory as i created user with Nafees
  • Then login from this user nafees and access from browser with publishing server ip or domian name in my case ip is https://192.168.175.133/rdweb & domain is  https://filev/networkstip.local/rdweb

  • Our Published Program is here now we can access it by clicking
  •  App Permission for Users & Groups right click on app 
  • edit properties  
  •  Only Specifies users and Groups can access Role
  • Now click on Add to add Groups or user to Give access